Saturday, July 19, 2008

Progress!

Ooh! I'm so excited to post this today! I have made progress! I finally finished up spinning those silk caps! I love spinning silk caps really! But drafting them is just not so fun to me. And they gave me a nasty blister. But they're done and they look lovely! So I've been making all kinds of progress on my tour de fleece. One of my goals for this is to spin as many different fibers as I can. I'd like to spin at least a bit of each kind of fiber that I have, and I have a bunch! So, thus far I have spun wool, silk caps, alpaca, merino, cotton, soy silk, and I've got some merino/tencel up next. It's so shiny! I bet you wanna see some pics huh? Here they are:


First up, my drafted silk caps!


Next, the finished yarn:


Here's the merino/alpaca in BRIGHT colors! I love them! It's SO soft!


Then there's the cotton/soy silk. This one is very soft as well, I love how it came out!


And Next up is the merino/tencel. I'll be spinning this up today!


So all in all so far I'd say that my tour de fleece is going rather well. I also have a bit of un-dyed wool going on my spindle that I pick up every once in a while, but that has never been near my camera so I don't have any pics. I think I'll dye it when it's done and take pics then.

So after this tencel/merino is done here's what I have left to try out: ramie, flax, hemp, BFL, firestar, cashmere, angora, mohair, tussah silk. hmm, 9 different fibers, I wonder if I'll get through all of them? After the tencel/merino will be some tussah silk blended with more merino, but I plan on spinning that into lace weight, so that could take a while. So while it's possible that I will not make it through all my different kinds of fiber I'm having a great time!

Oh yeah, and IF I can bring myself to part with them these yarns will be up in my Etsy store soon. But only IF, some yarns are harder to part with than others LOL!!

Happy spinning!

Friday, July 18, 2008

How I make a pattern fit ME! (or how you can make it fit you)

This is in response to Courtney's question about how to make a pattern fit you that may not be written to fit you the way you want.

1st: Measure yourself, and determine how you want your sweater to fit. A fitted sweater will need a little negative ease due to the fact that knit items tend to be a bit stretchy. Say you have a 30" waist, you may want your finished item to measure 29"at the waist to fit more closely. Keep this idea in mind when determining how many stitches you will want to do for your sweater.

2nd: Knit up a gauge swatch. This is your key to figuring out how many stitches you'll want for each part of your sweater. A gauge swatch is simply a 4"X4" knit piece that helps you to see how many stitches and rows you get with your yarn and needles. Since every knitter is different this is very important in assuring that your sweater will fit you when you're done!

3rd: With your measurements and gauge swatch in your hot little hand you're ready to cast on! I would suggest casting on the number of stitches recommended for the size you want to make if your gauge swatch is anything close to the gauge suggested for your pattern. I often have to cast on 3 or 4 times before I'm satisfied with the size, but the pattern gives you a place to start. What I do is cast on, knit a few rows, and try it on by slipping most of the stitches onto waste yarn, and slipping it on. If it looks like it'll fit just keep going, if it's too big or too small start over using your gauge swatch and measurements to figure out how many stitches to start with the next time.

Once you've cast on the right number of stitches , and knit the first bit of your sweater (in this case the neck of a sweater) follow the pattern for increases adjusting how many increases and the frequency of them to end up with the right number of stitches for you. I also suggest trying on your sweater when you're 1 or 2 increase rounds away from what you think you'll need because sometimes knitting stretches more than you think, and you'll actually need fewer increases than you thought you would, and sometimes you knit tighter than you thought, and you may need more increases than planned. Use the same idea for decreasing when you get to the waist shaping.

To make a sweater shorter or longer than the pattern you'll also want to use your measurements and gauge swatch. If you're taller than average you may need to add some rows, if you're short you may want to take some out. I try to take rows out where they will be less noticeable. This tends to be where there is little to no shaping. So when your pattern says to knit straight for 3" but you're 2"taller than average you'll want to take a measurement of your length in that area, and add length accordingly. In this sweater pattern you would knit straight from the last increase row until just a few inches above your natural waist when you'll start decreasing. So just knit straight a couple extra inches if you're tall (a couple less if you're short like me!). Adding and subtracting length is actually really easy! That's also one of the beautiful things about knitting for yourself! You can always make things the right length! :)

I hope this is helpful to people. It's just kinda what I figured out through my trial and error methods.

And don't forget that gauge swatch!!

Tuesday, July 8, 2008

Tour De Fleece 2008!

Yes that's fleece NOT France! I've joined the tour de fleece on Ravelry this year. Tour de Fleece was started a few years ago (I believe this is the 3rd year?) and is durring the tour de france each year. It's an online event where a bunch of crazy spinners try to spin as much (or as little) as they can/want each day of the tour de france that the bikers ride. So it started Saturday July 5th, I'm not even sure right now when it ends, but I think it'll be fun! So far I've spun at least some each day, (it's only day 4) but I haven't gotten a lot finished. You see I decided to start with this beautifuly hand dyed red wool roving that I plan on plying with silk caps dyed the same color. It'll make a nice fluffy, dull/shiny contransting yarn. The problem is that I'm somehow not in the mood to spin these silk caps. I think it's the drafting. Drafting silk caps is different than drafting wool, and I guess I need to be in the mood to do it or I end up putting it off. So while I may well have about 100 yards of silk spun up, I need about 200yds I'm guessing, and have very little desire to work with this fiber at the moment. *sigh* this is bad because I really would like to move on to spinning some lovely carded batts. But I'm making myself finish these caps first! Otherwise they man never get done! hmmm, wanna see the fiber I'm working with? Ok, here's the wool. It spun up so nicely. And here are the silk caps. They're so very soft, and spinning up nice and shiny. But I'm getting bored drafting them. Hmm maybe the cure is to draft while watching a great movie? It's worth a shot huh!? Anyway here are the silk caps, they were very fun to dye!
Anyway, I before the tour started I went through all my fiber, and decided how I wanted to spin it all because I'm hoping to make it through the vast majority of my fiber stash by the end of the tour. I'll try to keep you updated on my progress as the tour progresses. And if I'm ever going to finish up these silk caps I'd better get spinning! Hopefully I'll have pics of this fiber all plied up by tomorrow! :) Then it's on to something in batt form!
Happy spinning!

Monday, June 23, 2008

Here's my craft room!

I cleaned up my craft room a bit today and took pictures before I had a chance to mess it up again! Now it's not perfect, and I may have too much stuff, but it's as clean as it been in weeks if not longer. Besides it's hard to be creative without at least a little bit of a mess going on!
This first picture is what you see standing in the doorway.


This picture is directly to the right of the door when you enter. You can see some cards I have on disply above my computer table. You can't see my laptop because it's hiding behind the comfy chair I got from my hubby cuz he wanted me to be comfy while working in my room! :) To the left of the table is the printer and a bunch of scrapbooking paper.

This picture is of my sewing nook. It's in pretty bad shape right now. I'm WAY behind on MANY many sewing projects! LOL Oh and the little TV tray there in front is the kid's crafting table. It works out perfectly when the room is clean because they can put what they're using on my big table, and when they're done it all goes back on the tray. That way it doesn't get in my way when I'm working.

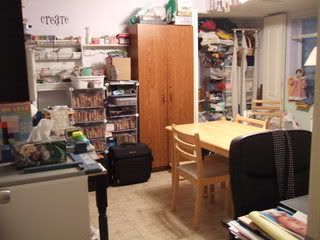
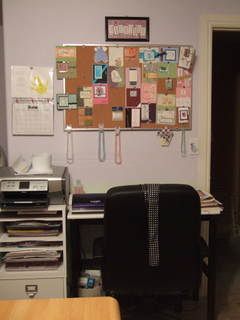
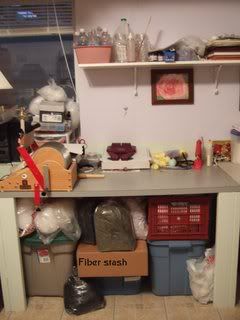
This is the table where I do a lot of fiber and yarn dyeing as well as fiber blending. And this is aldo the table where I use my knitting machine. I haven't spent much time with my kitting machine since I got the drum carder though. Oh yeah and you can see all the boxes and bags under the table. Most of that is where I store my fiber stash. But some of it is fabric. The fabric is trying to take over! But the yarn, spinning fiber, and paper are definatley giving the fabric a run for its money! Oh yeah and the red bin is full of yarn!

This is my spinning corner and closet. The big tall wierd looking thing is my macine quilting frame. All the white drawers are full of fabric as is the shelf above that doesn't show very well. The hanging shelves are full of yarn both hand spun and commercial. The pink drawers on the Left are full of MANY other crafty things!
This wall is where I keep my stamps (the cabinet is full of stamps too!) and my ribbon. My ribbon collection makes me very happy!

And last but certainly not least this is my scrapbooking desk. It is packed full of stamping and scrapbooking supplies. I think it's about to explode! LOL!!

Oh and you can see a little bit of the table that is in the middle of the room in this picture as well. That is where I really work on current projects. This table has many different things going on at any given moment. Seeing as how there's no space on my scrapbooking desk this is where I scrapbook, it's also where the kids work on their crafts, and where friends scrapbook with me. I've also used it to wind yarn into balls, and dye roving. And it used to be the kitchen table so it's been through a few canning seasons, and hundreds of dinners. Awww, I think I like this table! Too bad you can only see a few inches of it huh? Oh well. Anyway I hope you liked this little tour of my room. You can see there's a LOT going on in here. Maybe I need a bigger room? Oh hunny!


Saturday, June 21, 2008

5 kids + a full time student for a husband = crazy

Holy cow! It's been forever since I last posted! It would appear that I've not done anything, but that is just not the case. I've done a LOT, I just have had a hard time finding the time to post about it lately. You see, my very hard working hubby has just gone back to school full time, and I have realized how utterly lazy I was b-4 when he was a "normal" husband that came home from work every day and didn't spend all night doing homework. While I was pregnant with the twins and basically threatened to be put in the hospital indeffinatley if I did anything around the house my hubby did a LOT! And I'll be honest, I liked that! So I kinda let him continue to do whatever I didn't want to do for a while after the twins were born (I had to recover right?). Well, now he doesn't have time, so I'm back to doing just about everything I did b-4 the whole twin pregnancy thing (he still helps out a lot though), only now there are 5 kids to keep out of the dishwasher (though only 2 of them really try to climb in), and read to, and feed, and wash laundry for, and help with homework, and keep track of who went where etc. And somehow with all of this I do find time to do stuff, just not much time to post about it though. I'd like to change all that! So, I'm taking back my blog! I plan to post much more often than I have been.

Hmmm... now as I recall I left off at some yarn and batts? Well I'd like to finally share with you what I knit up with that first VERY bulky yarn that I spun on my wheel (I'd also like to note that I'm really happy with how this dyed up). It's a Quant, you can find the pattern for FREE online at http://www.knitty.com/ in their archives.

I did have to alter the pattern a bit to work with my yarn though. My yarn is MUCH more bulky than what was called for, so I used bigger needles, and took out one of the square repeats across. And it's a good thing too because this thing turned out just the right size. I think it would've been too big if I'd followed the pattern. Well, that and I would've run out of yarn. I only had about 90yds to begin with. So to anyone looking for a great project to knit up that doesn't take a lot of yarn I vote for this one!

Then there were some batts. Well I finally dyed them, and I must say I LOVE how they turned out! Just LOOK! These spun up like a DREAM! I spun some super fine singles, and navajo plied it (for those that don't know what navajo plying is it's a plying method that creates a 3 ply yarn with a single strand and can help to maintain colors for striping. You can see how it's done on http://www.youtube.com/) for a really pretty fingering weight yarn with really long stripes. I think the stripes are about 10 yards long or so. I have only spun up half of it so far, but I have about 220 yards so far (that's enough for ankle socks). Here's the yarn I ended up with:


And then last but certainly not least there was that roving that I dyed. Well I'm happy to say that it turned out to be 513 yards of a fabulous fingering weight yarn! It'll make some really nice socks one day when I find just the perfect pattern. I'm calling it "Pink Lemonaid"


Well I think that's it for this post. I have lots more yarn to share, but that'll have to wait for another day. Now I have to go find the new stuffed doggy that my 3yo got for her birthday.
Have a great weekend!

Monday, March 24, 2008

A NEW HOBBY hehehe

I have decided that the fiber arts are fabulous! So naturally I've been researching all things crafty that you can do with fibers of all sorts. I love yarn, and become mesmerized when I see beautifully dyed yarn especially if it looks soft and shiny. So I figured making my own yarn would be so cool! I was right! My spinning all began very innocently with some reading, and more reading online. Then I figured I could probably do it after reading so much about it for months! So I ordered some wool, and headed to the craft store to pick up some supplies to make my own home made drop spindle. I then started playing with the wool and spindle. It was fun, but I wasn't real good at keeping the spindle spinning while drifting out my wool. So I hatched a plan to get a spinning wheel because it seemed to be right up my alley. Then disappointment set in as I realized that spinning wheels cost a bit more than 5 bucks! Okay, a LOT more than that! Luckily I knew where to ask (craftster has a great fiber arts forum)! I discovered a place that makes spinning wheels out of PVC pipe and a wheelchair wheel. As much as I love asking my hubby to make things for me that neither of us knows how to make I really had no idea how this thing should work when it finally is done. So how would I know if there was a problem or how to fix it? Yeah I wouldn't. So I somehow talked him into letting me buy something I had no idea how to use! LOL!! Isn't that nuts!? But my hubby is a really nice guy, and he likes to keep me happy, and he knew that I'd figure out how to use it. After all I learned how to knit and spin and make a spindle online, why not figure out how to spin there too? So I ordered this wheel that I'd heard great things about and the agony began. I thought I was going to die before it arrived. Luckily I survived though. And I LOVE it! It's just sooooo cool! Watching the fiber be spun into yarn is almost hypnotic. Plus now I get to play with all these great fibers! I also ordered a variety of fibers to spin on my new wheel (alpaca, angora, Bamboo, cashmere, mohair, nylon, firestar, silk, soysilk, and wool), and if you have all this fiber you gotta have something to blend it with right? Of corse you do! So, I ordered a drum carder too! HEHEHE and hubby put up with all of this so well! Though in my defence I researched all of it for months and stuck to a budgeted amount before ordering anything so there! hehehe

So I bet that a lot of you are wondering what on earth a PVC spinning wheel looks like huh? Well it looks just like any other spinning wheel only it's made of PVC hehe. Oh yeah and I have a pic to share too. It's more like a modern wheel, and no it doesn't look like the one that Sleeping Beauty pricked her finger on, though the 2 do the same thing.

Anyway, here's my wheel. Isn't it cool?

OH and if you're wondering what on earth a drum carder is. Well, it's a dangerous tool if you don't know how to use it right. It's used to combine fibers, or align fibers so that they're ready for spinning. They're also more than $5! Darn it! I ordered mine from http://www.coppemoose.com/ and it came with 8oz of "free" silk (as in it wasn't extra, but I had to plunk down the $$ for the carder to get it, is that really free?? hehe). Oh silk is soooooooooo soft! I'm gonna have fun spinning it! So here's a picture of my Strauch "Petite" (it's not small) Drum carder.


Anyway, I ordered a kit rather than a pre-assembled drum carder. It saved me $15 and I got to learn how it was put together. That's how I know it can be dangerous! I was moving it, and poked my thumb on it, and made it bleed! See!


So a word to the wise, DON'T touch the spikes on your drum carder and you'll get along better with it!

So of course having these new toys gives good reason to USE them right!? So here are my latest projects.
This one is my first hand spun yarn.


Here's a picture of the first fibers I carded together, pulled into roving, and dyed. It's 25% nylon 75% wool. I'm hoping to spin it into sock yarn one day. Though I think I'd like a little more practice to get more even yarn first.


And this one is a 2oz batt of wool/silk that I carded together. It's about 1/3 silk 2/3 wool. The silk makes it shiny. I'm going to dye this one, but I'm not sure what colors yet, and I'm not sure what weight it'll be when spun. I'm waiting for it to tell me what it wants to be. Right now it's happy being a beautiful cloud of fiber.

Be sure to check back later. I've dyed up the handspun yarn, and I'm working on a hand knit headband (too bad it's getting warmer huh? did I just say that?! I hate the cold! But you don't wanna go running around in a wool headband in the middle of summer. oh well, one thing's for sure, winter always comes again around here!). Hopefully it'll be done soon! I can't wait to see it when it's done!
Have a great day!

SOCKS!

I have socks! For those of you who haven't been bitten by the sock knitting bug you may find it hard to believe that I'm having so much fun taking so much time making something that I'll just put holes in by wearing them around on my feet! But it's true! I've been bitten by the sock bug! Socks make a great knitting project for so many reasons!
1. They're reltively small, and therefore can be finished quickly.
2. You can do any number of beautiful patterns on socks so they're always interresting.
3. There's so much lovely sock yarn out there, and knitters just wanna try it all!
4. You can't buy the beautiful socks you can knit.
5. They're warm!


See! I've just listed 5 reasons off the top of my head why socks are so great! And I'm sure all the sock knitters out there can come up with many more! So now hopeflully you know why I love to knit socks, and if you don't, well... maybe you should try some for yourself and see!


I bet you wanna see some of these socks that I love to knit don't ya? Okay! here ya go.
This is the first pair of socks that I ever knit. They're the Baudelaire sock pattern FREE from http://www.knitty.com/ I made these from some wool/nylon sock yarn in burgundy. I love them. They took me forever, but that's what I get for going for fancy shmancy lacey socks on my first pair. But this is what I wanted to knit, so I did. This first pic is of them on my needle. I'm an impatiend knitter and for fear of never making the second sock I made them 2 at a time on one long circular needle. It's not as hard as it sounds. Just a litte trickey to keep your yarn from getting tangled up seeing as how you need to knit from 2 different skeins of yarn at a time. Anyway enough rambling about these socks. Here are the pics.


Here's a pic of the socks fresh off the needles.


Here they are on my very happy feet!


These are some toddler socks I just kind of made up. I thought it would be cute to knit some socks for the twins. So I knit up a swatch with some yarn that I found at an adorable little yarn shop in South Jordan called "From Robbin's Nest" It's all acrylic which I thought would be good for toddlers since they don't take real great careo f their socks anyway. And mostly I just wanted to make some cute socks!


This is pair of socks that I just finished up today. I used the generic toe-up sock pattern from Knitty.com (sorta, I read the pattern once, then kinda guessed on the rest). These are made with my own hand dyed yarn, in a colorway I'm calling "Mint Dream". The design part of the socks is kind of a play on seed stitch. I saw a REALLY expensive sweater in the mall with this stitch pattern, and figured I could just do it on socks to see how I like it.
It's really simple.
row 1: K2, P2 across the top,
row 2: repeat row 1,
row 3: P the K's and K the P's.
row 4: repeat row 3.
Repeat rows 1-4 for the pattern part of the sock. Makes for a fun texture.
So here's a close up of the pattern.


Here's the side view.


And here are my happy feet.
I'm not sure what pattern I'll use for my next socks yet, but I already have the yarn! I do however have a few projects that I feel obligated to finish b-4 starting on a new one. So it could be a while before I get anymore socks done. But I hope you like looking at my socks as much as I like wearing them! LOL
Happy Crafting!